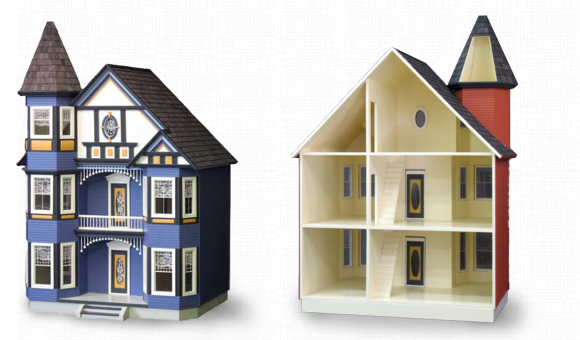


Windows
Miniature doors and windows are important elements to the finished look of your dollhouse. Most dollhouse kits come with windows. Besides the windows which are included in the kits, there are many optional windows available. (Check out our collection of dollhouse doors and windows for a place to start!) You can use these to substitute the windows in the kits, or as added decoration to the areas of your dollhouse that are bare and need more flourish. Before you begin to install windows on your dollhouse, you must make some fundamental decisions. First, decide if you want your dollhouse to have working or non-working windows. Because working windows are more elaborate,they can cost twice as much as non-working windows. Second, all window components should be painted prior to installation (see the section on Painting for specific instructions).
Remember to keep all the parts of a window together, as each may vary slightly. Also, if you remove the acrylic window panes, put them in a plastic bag so they will not get scratched.
Non-Working
Non-working windows come in many diverse styles that are less expensive than working windows, but still have a similar appearance. Some of the fancier styles are available in both the working and non-working variety.
Most of the non-working windows set into the house 3/8 of an inch. Therefore, these windows will not fit in die-cut houses that are made of 1/4" Phillipine mahogany plywood. You might be able to trim the interior extension to fit the project, particularly those windows that do not contain acrylic panes. (See What You Always Wanted to Know About Houseworks Section)
The acrylic pane in most standard, non-working windows is removable through a slot in the top of the window frame. This makes it easier to paint. The window muntin can be added for the multiple pane style.
The multiple small pane windows that resemble the windows of the Colonial period do not have acrylic panes or interior trim. You will find the materials for the acrylic panes at a glass company or hardware store.
If you take your window in with you, they will normally cut the acrylic pane to fit your window. To add the interior trim, use the miniature door and window casing that's available at most hobby and miniature stores (see the Trim Section).
The smaller windows (often used as attic or gable windows) can also have acrylic inserts added in order to give them a "leaded" window look. Furthermore, when these inserts have been painted with stained glass paint, they take on the appearance of stained glass windows. (See both the Miscellaneous and "What You Always Wanted to Know About Houseworks" Sections for more details).
Working Windows
To give your dollhouse a more realistic look, you will want to use working windows. With working windows, you have many options for the exterior decor of your dollhouse. You may want to have a doll hanging out of or crawling into the window, or have a pie sitting on the window sill. You can put an air conditioner in the window, or have a curtain blowing to simulate a cool summer breeze. These dollhouse windows are double hung, and can slide from the top down, as well as from the bottom up.
Most of the traditional size working windows come in both single and side-by-side double working windows. For variety, use the same style window in different widths.
There is a working casement window, a double sliding window, and a double casement window for the person who wants a more modern dollhouse. Besides the modern and contemporary look, these windows will work well with many styles of architecture.
All working windows extend 1/2" into the dollhouse, because there is an extra 1/8" to allow for the double hung windows. Since most houses are made of 3/8" plywood, you will find that the working window will extend too far into the house. The window should be flush with the interior wall to allow for trimming. To achieve this, you have two options:
- Take the clapboard to the edge of the window opening, and glue the window over the clapboard.
- For houses that have clapboard grooved into the plywood take a piece of 1/8" x 1/8" strip wood, cut three pieces to glue around sides and top of the frame behind the outside trim. Then glue the window onto the house. No one will ever notice. I used this method on my large Victorian Painted Lady.
Working windows also come with muntin strip wood, in measurements of 1/16" x 1/16". Muntin are the wood strips that divide the panes of a window into sections. Instead of using small individual panes with wood strips between them, a constructed muntin made of wood or plastic may be snapped in over the single pane. To make a muntin, follow these directions:
- Paint or stain the mullion strip wood.
- Decide if you want 4 over 4, 6 over 6, 9 over 9, Victorian, Diamond, etc. design.
- Cut a piece of white shirt cardboard or heavy paper to fit over the acrylic pane inside the wood frame.
- With a ruler and pencil, draw the pattern for the mullion on the piece of cardboard or paper.
- Place the cardboard or paper pattern behind the acrylic pane to see if the pattern is to your satisfaction.
- Measure the mullion sticks.
- Cut and lay the mullion sticks over the pattern and glue the pieces together. I suggest that you use a piece of wax paper or tracing paper between the pattern and the pieces in order to keep the glue off the pattern.
- You can use the pattern for all of the windows (as long as they are the same window or same size). This will result in uniform muntin for all of the windows.
- Let the wooden mullions dry.
- Touch up with paint if necessary.
- Then glue the tips to the wooden frame.
If you do not wish to make your own muntins, or your window does not come with muntin strip wood, you can use plastic muntins. They are from pre-assembled moulded white ABS plastic. They can be easily trimmed to fit the window with either an X-Acto knife or nail clippers. Be careful not to take too much off! Snap them into the window and glue the tips. Plastic mullions can be painted before installing or used as is.
Finish the working window by adding a brass window handle pull on the interior of the bottom window. Glue and add nails in the holes (see the "What You Always Wanted to Know About Houseworks" section for more details). This will help raise and lower the windows.
Doors
Doors come in a variety of styles, from the simple to the elaborate, that may include features such as oval glass inserts and side lights. Primarily, these individual doors are available for use with shell kits and projects created from plans.
Most doors are simple and practical in their construction. They are pin hinged into a frame that is glued into the correct size opening in your house. Because some doors are wider than normal, be sure to check the size opening in the dollhouse to see if the door will fit. To accommodate these doors in a dollhouse that is already assembled, cut the opening for the door with a hand held electric sabre saw. If the dollhouse is not assembled, the opening can be cut or widened with a scroll saw. The next step is to stain or paint the door. (See the section on Painting for more instructions on painting iniature windows and doors.) Let the door dry by opening the door and standing it on the frame and the door. After you have painted or stained and varnished the door, you are ready to attach the hardware. If you are going to install doorknobs, locks, door knockers or other hardware, it is easier to do so when the door can be laid flat. In other words, install all hardware before attaching the door to your dollhouse. (See the section "Applying Hardware" in the chapter "What You Always Wanted to Know About Houseworks").
Exterior Doors
The thickness of the plywood used in your dollhouse or kit will determine whether the door will go over the clapboard siding.
- Most of the door frames extend 3/8" into the house.
- You want the edge of the interior frame flush with the interior wall.
- On a 3/8" plywood dollhouse, glue the door onto the house and butt the clapboard siding to the door frame.
Trim the inside of the door frame with the interior trim provided with the door. This frame will fit on the edge of the door frame and the interior wall, covering the space between the frame and the wall. If the interior trim is not provided with the door, use a door and window casing trim. (See Trim Section.)
When the plywood is thicker than the door frame, glue a piece of strip wood (1/8" x 1/8" for 1/2" plywood) on the inside edge of the frame. Then glue the trim on both the wall and the strip wood. This procedure will fill in the space left between the plywood shell and the door frame. Also, use this procedure if you decide to glue the door over the clapboard on 3/8" plywood. When you glue the door over the clapboard, be sure that all the clapboard has been finished and applied before the door is glued in place. Furthermore, it is a good idea to finish wallpapering before gluing the door in place. Exterior doors always open inward.
To make them swing out:
- Remove the bottom piece of frame below the door. Using an X-Acto knife, cut along the seams where this piece has been glued to the side pieces.
- After removing the bottom piece of the frame, turn it around (this procedure will also turn the door around).
- With a pin drill, drill a hole in the top piece to pin hinge the door on the other side.
- Put the top pin in this hole and glue the bottom piece in place (it should be reversed from its original position) to the two side trims.
- The bottom pin will be in place in the bottom piece.
- Now the door will open to the outside.You may use this procedure for most exterior single doors.
Interior Doors
Interior doors come in several styles and sizes and really make a dollhouse complete. They also give the door opening a more finished look. Stain or paint the interior door to match the wood trim of the room in which it will be installed. Sometimes, you may want to paint one side and stain the other side. Now you are ready to stain or paint the interior doors. (Refer to the Paint Section for more instructions.
Installing the Interior Door:
- All wiring, wallpapering, flooring and carpeting should be finished before the interior doors are glued in place.
- The hardware should be glued on the door before installing the door.
- Decide which way you want the door to open, so you will know which side of the wall to install the door.
- After gluing the door into place, trim the other side. Many interior doors include the trim for the other side already cut to fit. You may now glue this in place. Doesn't the room look great!
Shutters And Dormers
Shutters
For many years the shutter was used to keep out both heat and inclement weather, and also for decoration. Therefore, many dollhouses are trimmed with shutters that portray a particular period of architecture.
There are many sizes and styles of shutters available. To know which size shutter you want to use with your windows, it will be necessary to decide where you want to place them.
On a lifesize house, the shutter is installed between the top trim and the window sill. This is necessary, because the shutter is hinged in such a way that it can be closed over the window. Different decorative objects are then used to hold the shutters open. To recreate this look, you can use such decorative hardware as the "S" hook. For more information, see the "What You Always Wanted to Know About Houseworks" section, where the "S" hook is discussed in more detail. For decoration, place the shutters at your discretion for the look you wish to create. Glue the shutters onto the clapboard on either side of the window.
Dormers
Both the size of the roof, as well as the style of your dollhouse will determine the use, number and size of dormers. There are two methods for installing dormers:
- Attaching the dormer without cutting holes in the roof. This method gives your dollhouse the dormer "look," without interrupting the line of the interior wall. Before attaching the dormers, paint or paper the inside walls of the dormer and attach curtains at the window.
- Attaching with holes cut in the roof. This method allows the dormer to be seen from inside the dollhouse. It also allows natural light to brighten your dollhouse. Holes must be cut in the roof following the template on the package of the dormer or pattern for the dollhouse.